Apple iOS
Setting up your Apple iOS Email Account Setup for your website hosted by Apexweb

Below are instructions for adding your Apexweb hosted email account on an Apple iPhone or Apple iPad device running iOS operating system.
Ensure you have an active 4G or wifi connection before adding your email account.
1. Tap Settings.
2. On the Settings screen, tap Mail, Contacts, Calendars.
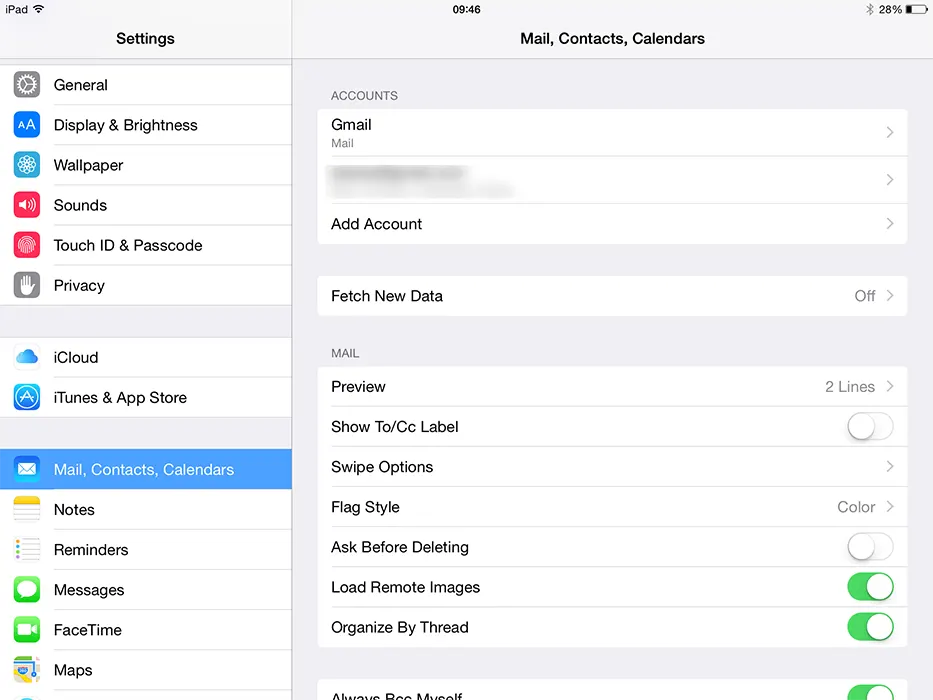
3. Tap Add Account
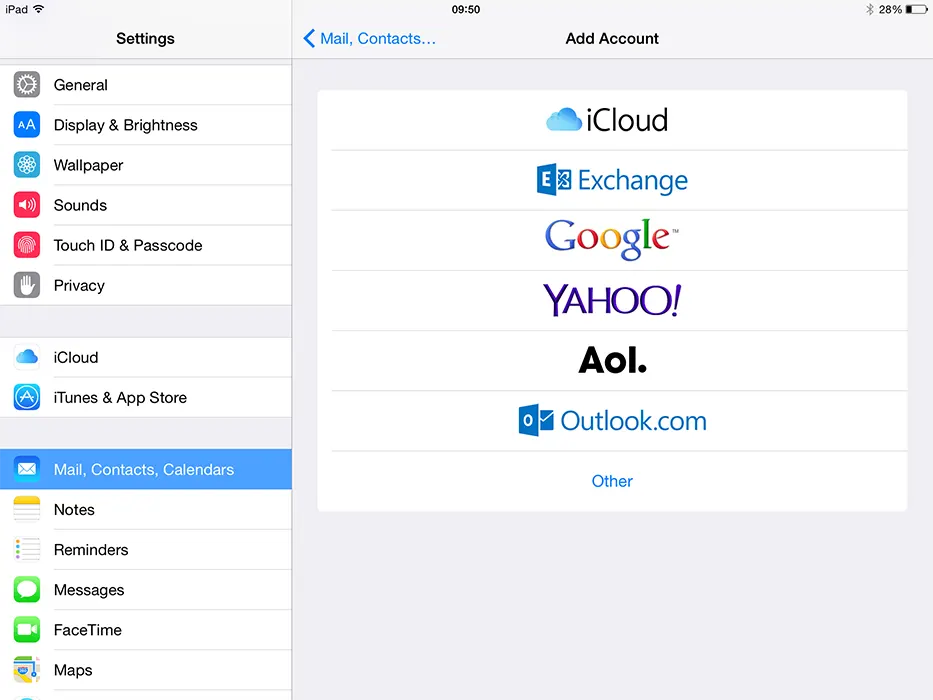
4. Tap Other.
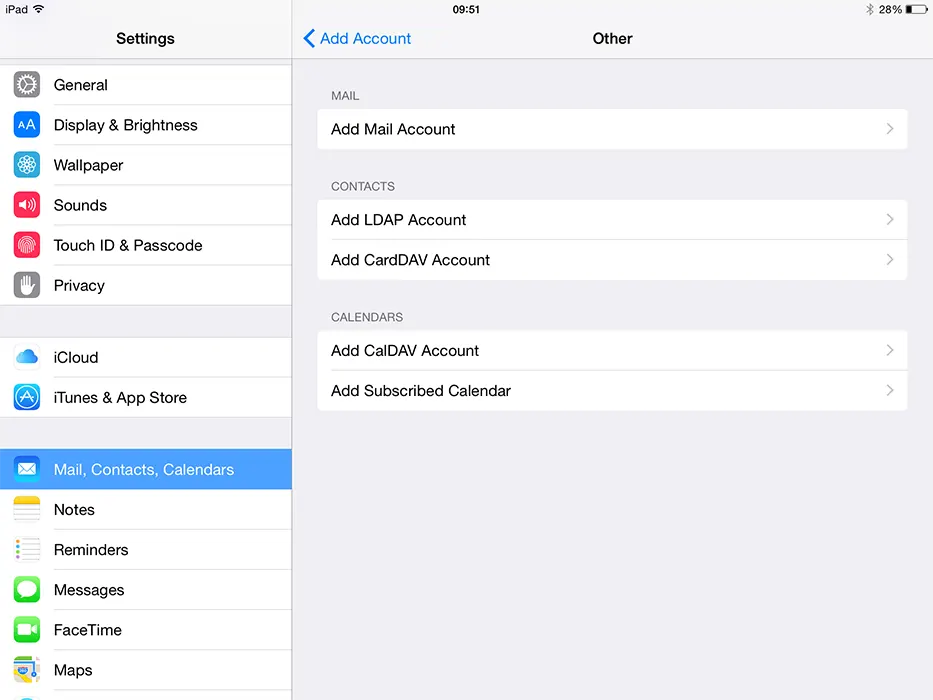
5. Tap Add Mail Account.
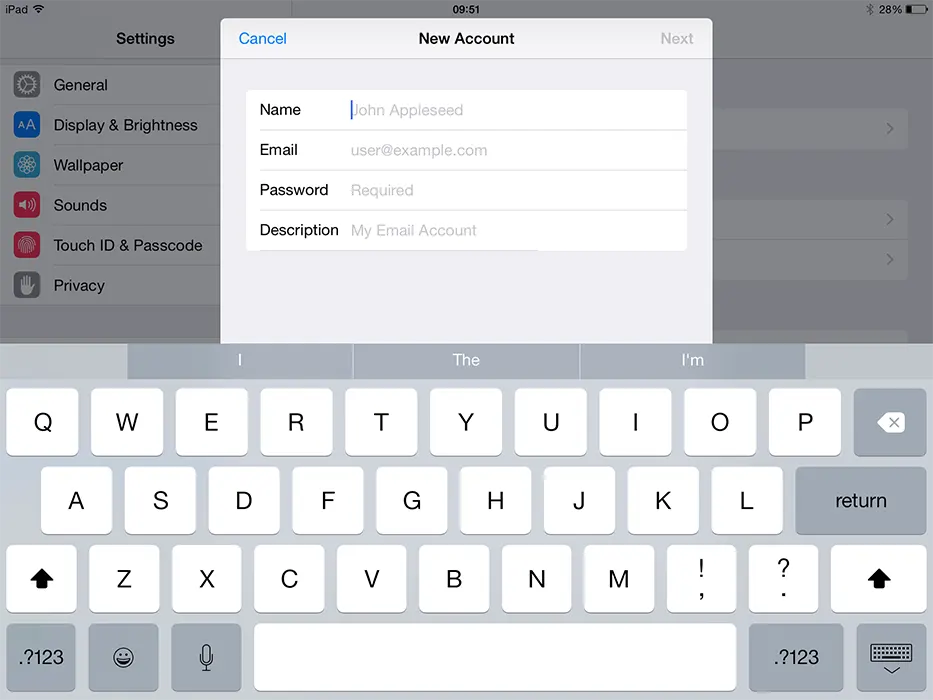
6. Complete the following fields, and then tap, Save.
Name
The name to display on your email.Address
Your email address.Password
Your email account password.Description
A description of the email address to display in the email account list on your iPhone.
7. Tap POP.
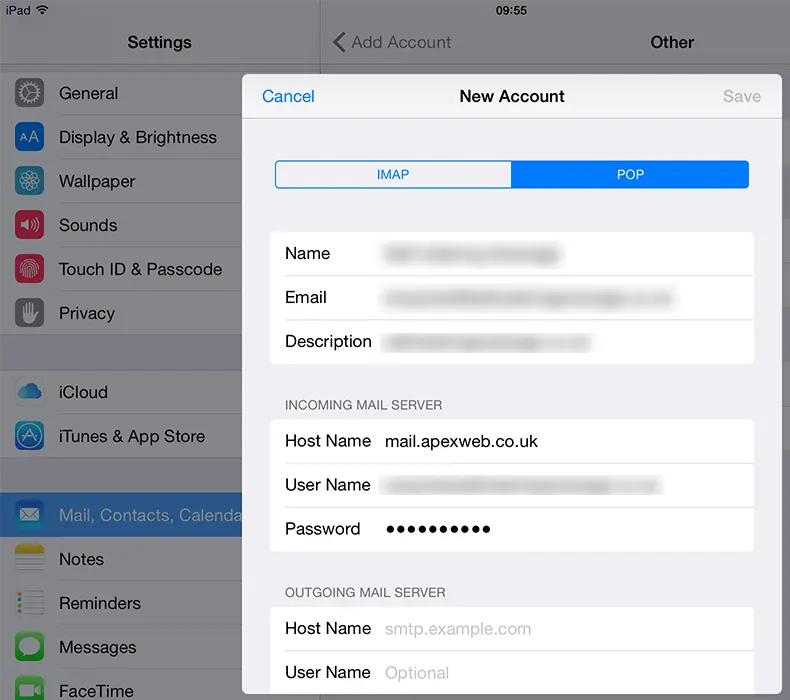
8. Enter your Incoming Mail Server information:
Host Name
The incoming POP server as provided for your email account.User Name
Your POP username.Password
Your email account password.
9. Enter your Outgoing Mail Server information:
Host Name
The incoming SMTP server as provided for your email account, this is the same as the incoming POP server..User Name
Your POP username.Password
Your email account password.
10. Tap Save.

11. The iPad will start Verifying the email account
12. A prompt will show saying “Cannot Connect using SSL, Do you want to try setting up the account without SSL?”
13. Tap Yes and the iPad will continue Verifying the account, this can take several minutes.
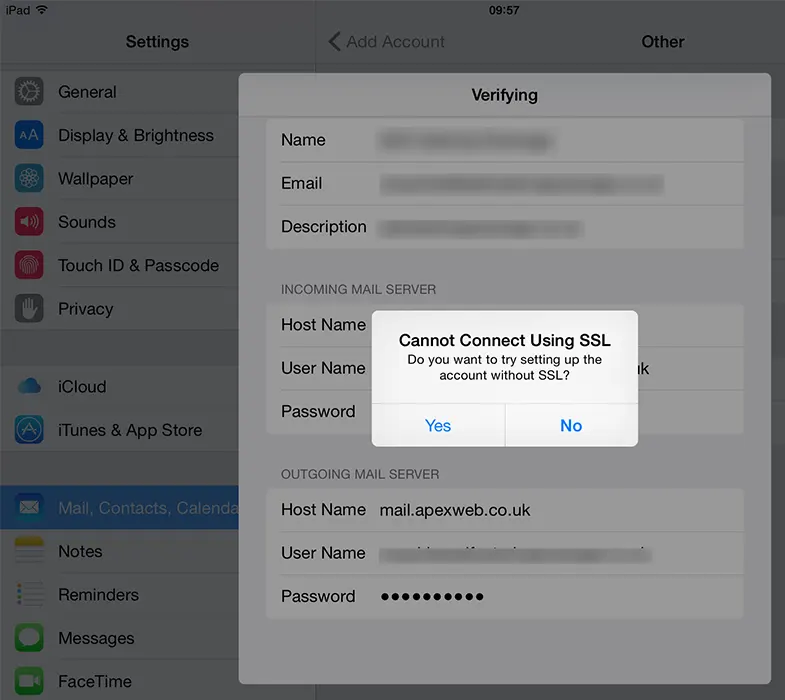
14. If you are prompted to connect without SSL, tap Yes. This may appear twice.
15. Tap Yes and the iPad will continue Verifying the account and when complete return you to the Settings screen with your new email account added to the Accounts list.